
Artefact Four from Rob Antill on Vimeo.
So its been a while since I completed Artefact three, been busy completing the client project then the ski trip and lots of other things that have been going on. However its now done! I still feel I could add some more to it but I am quickly running out of time so something is better than nothing at the moment!
This time round I looked at HDR (High Dynamic Range) Images and how they are used to make a 3D scene much more realistic.
Here’s the completed video..
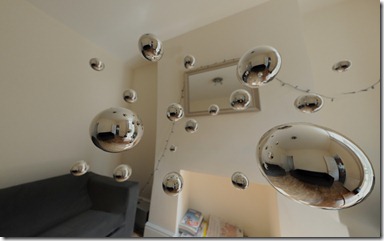
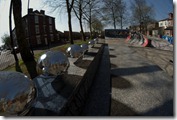
Here’s a high res still from the video. I’ve added a slight depth of field to the shot too.
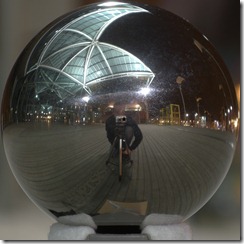
There are two ways to create a HDR image ready for a 3D package like 3Dsmax. One way is to take photos of a completely reflective chrome ball. This is the easiest method because it requires photos to be taken from one place at one angle. But there are many problems with this method. The resolutions will not be very high, If there are scratches on the ball that will effect the quality of the image, it’s hard to get rid of yourself and the camera out of the reflection and most importantly you don’t get the full 360 degrees of the environment.
Here’s an example of a chrome ball HDR.
So the method I was interested in is the used of a full 360 degree image called an Equirectangular (ek-u-rec-tang-u-lar) panorama.
This method involves taking photos from multiple angles and then stitching them together with software called Hugin. I’m familiar with this software because I use a similar technique to create the stereographic images on my site.
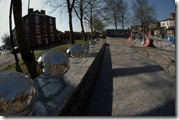
Below are the Multiple exposures of the skate park panorama I had to take then stitch together. I was using my Nikon D90 with the Falcon 8mm fisheye lens. Exposures were
-1 = Shutter Speed 1/3200s, F stop 5.6, Iso 250
0 = Shutter Speed 1/800s, F stop 5.6, Iso 250
+1 = Shutter Speed 1/200s, F stop 5.6, Iso 250
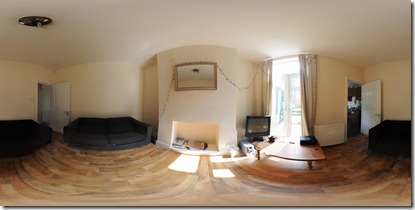
Below is the stitched Equirectangular image I used for the living room shots. Getting a good stitch inside is always difficult. Usually you can get the Hugin to find the matching points between the photos automatically but with this photo I had to manually add about 40 points for the Hugin to know how the images go together. There’s a small parallax error on the right hand side of the wall next to the TV. Errors like this are usually quite simple to fix in Photoshop, this one just slipped my attention.
Now that I have my Equirectangular image I then used this as an environment map in 3Ds Max. Finding tutorials on how to set up this scene properly with Mental Ray as the renderer was really hard. I had to adapt what various tutorials said to get the results I wanted. I rendered out the scenes in layers and also exported the Z-depth so I could add depth of field to the CG balls. I could have added different shapes in the scene but I felt spheres worked well for the purpose of showing off the HDRs.
I also tried adding some objects to photos and then using the HDR map as a reflection. This was quite hard to get right and I abandoned that idea because it was taking up far to much time. It is something Ill look in to in the future.
Below are the results I got.
1.Chrome balls – no casting shadow.
2.Chrome balls – Casting crappy shadows (Getting shadows to match was a real mission so I gave up before I went crazy!)
3.Chrome balls and glass box – testing out the glass to see how it would refract the background.
So that’s about it. if there’s anything you would like to know just stick a comment in below.
Any comments or suggestions are welcomed 🙂



Recent Comments